Wearable Configuration
The Wearable (and OEM) model variants have additional configuration options compared to the other form factors. This is mainly due to the extra functionality and interfaces such as a built-in Wi-Fi radio.
WiFi Radio (Wearable/OEM only)
Fig. 1 shows the Wireless Configuration page for the Wearable/OEM models. Radio 0 (above) refers to the WiFi radio and Radio 1 (below) refers to the Mesh Rider radio.
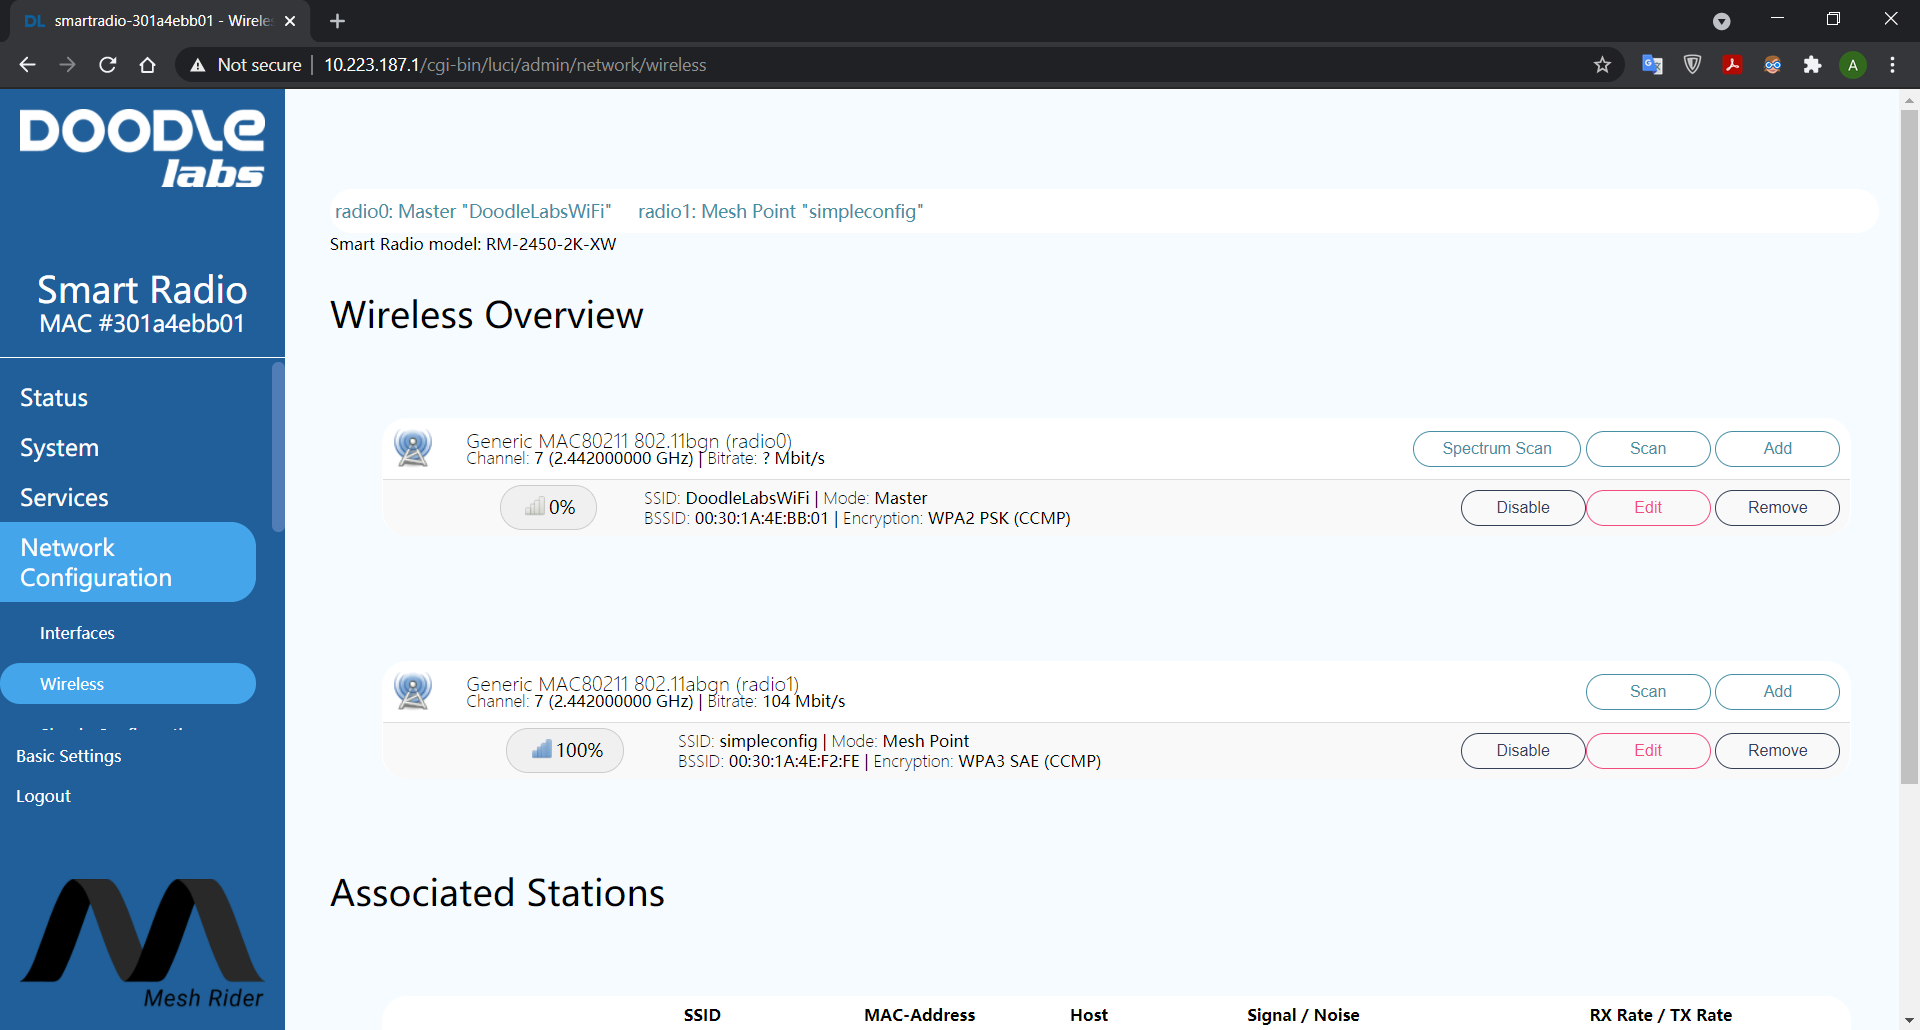
Fig. 1 Wireless Configuration Page
Info
For C-Band radios, the Mesh Rider radio is Radio 1, and the Wi-Fi radio is Radio 0.
AP Mode
The WiFi radio is set up as an AP by default and is bridged to the Mesh. You can adjust the default configuration directly from the Simple Configuration menu, or by navigating to network configuration -> wireless in the Advanced Settings menu. By default, the built-in Wi-Fi radio starts up an Access Point with SSID DoodleLabsWiFi-<last 6 hex digits of MAC> and password DoodleSmartRadio.
Client Mode
The WiFi radio can also be configured to connect to a hotspot and in this case, it will do the following
- Start a DHCP server on the Mesh Rider network.
- Enable DHCP client mode on the WiFi radio and join the hotspot's network.
- Perform network address translation (NAT) between the Mesh Rider network and the hotspot's network.
Note that because NAT is used between the hotspot's network and the Mesh Rider network, the IP address range in the Mesh Rider network is not accessible (by default) from the hotspot's network. This means that while Mesh Rider devices will be able to access nodes on the hotspot network such as the internet, devices in the hotspot network will not be able to talk to applications in the Mesh Rider network unless port forwarding is enabled for those specific applications. This is similar to how an office WiFi network works. In order to configure the WiFi radio as a client device, click the Scan button next to Radio 0. The radio will scan for available networks and create a list like the one shown in Fig. 8. Click the button Hotspot assistant next to the network you wish to join and follow the on-screen instructions.
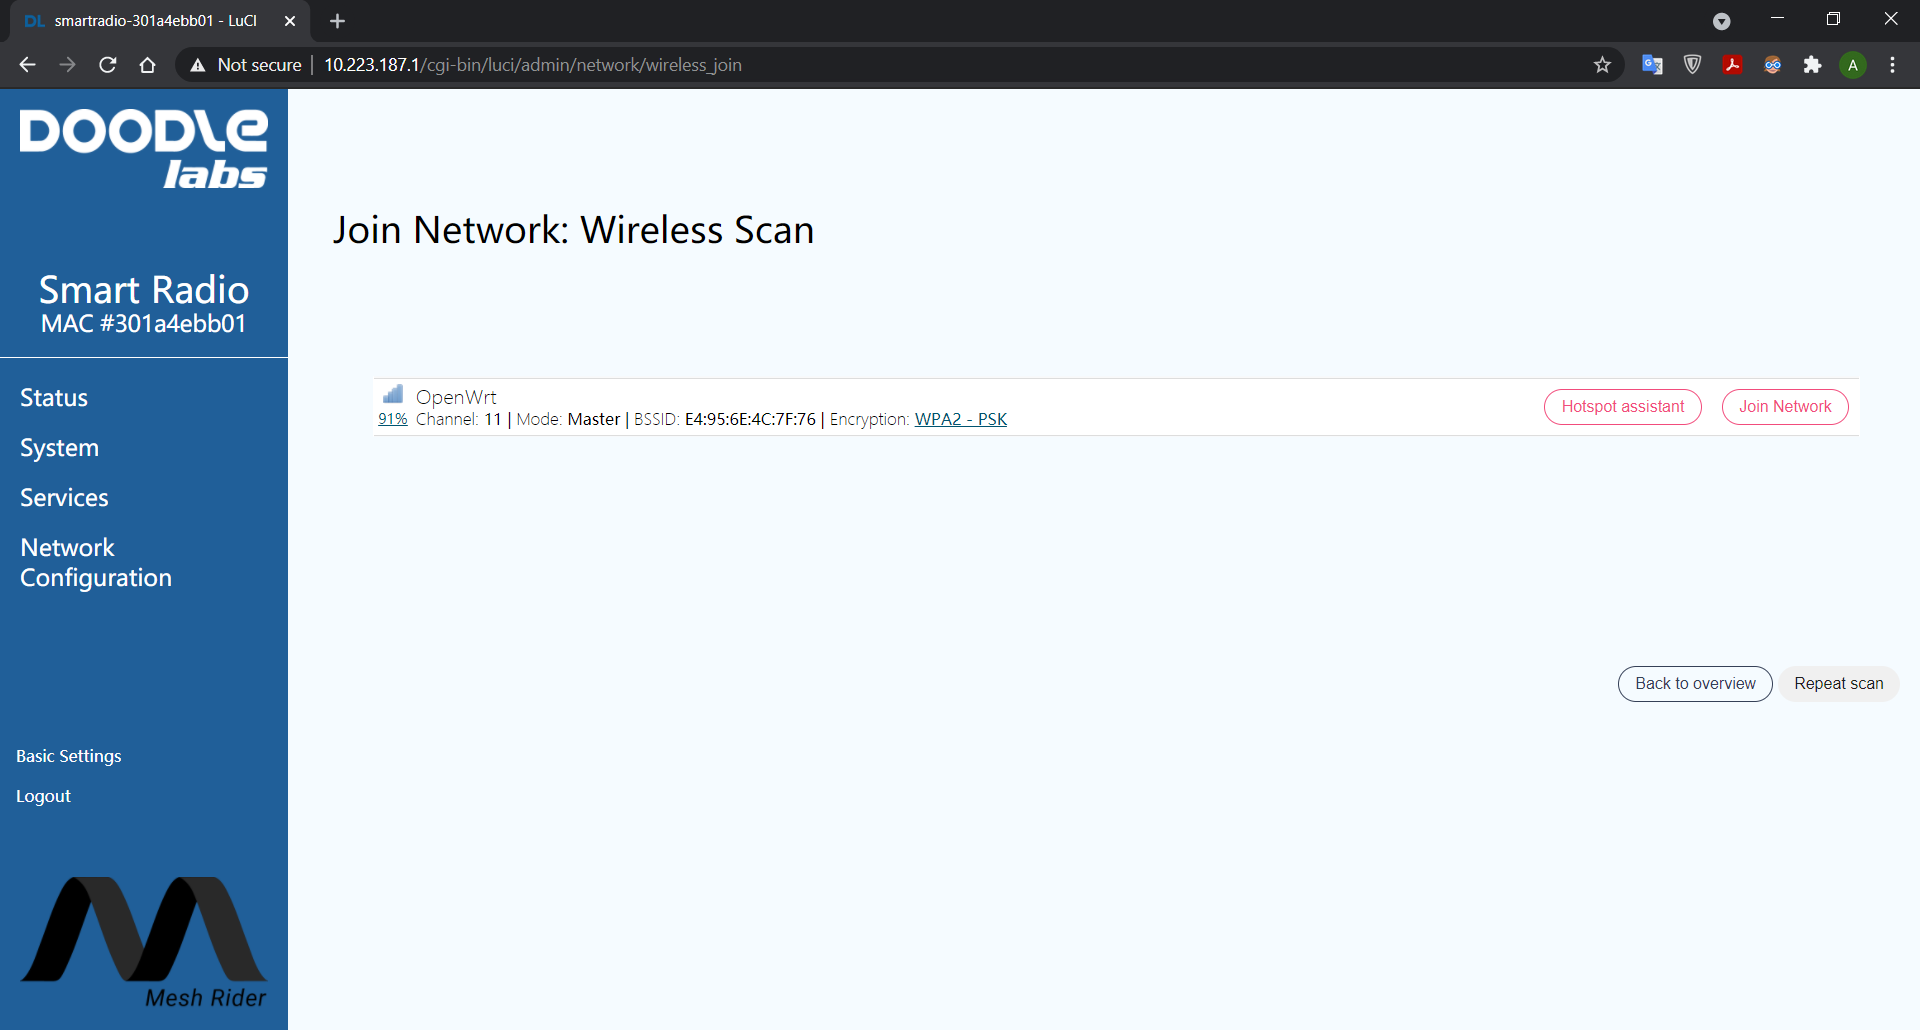
Fig. 2 Scanning for available WiFi networks
Additional Wearable Configuration and Information
Turbo Mode
By default, the Wearable Mesh Rider radio is in Turbo mode. When Turbo mode is disabled, the radio attempts to save power by applying a throughput cap (6 Mbps default), and switching to a SISO antenna configuration. Turbo mode can be toggled using the Turbo mode button, or through the GUI or CLI.
Automatic Standby
The Wearable Radio can also go into automatic standby, but this is disabled by default. When enabled, the radio will go into standby mode to save power when the network is idle. In addition, the Wi-Fi radio can automatically be disabled when the Mesh Rider radio is not associated. Standby mode can also be reached through the power button.
GUI
The Wearable Mesh Rider Radio has an additional configuration page at System -> Wearable Mesh Rider Radio. This menu is only visible when the Advanced Settings are enabled. The Wearable Mesh Rider Radio includes GPS, battery voltage and temperature sensors which are reported on this configuration page. The user may choose to enable standby mode, or the temperature control fan, or switch to external GPS and Mesh Rider antennas.
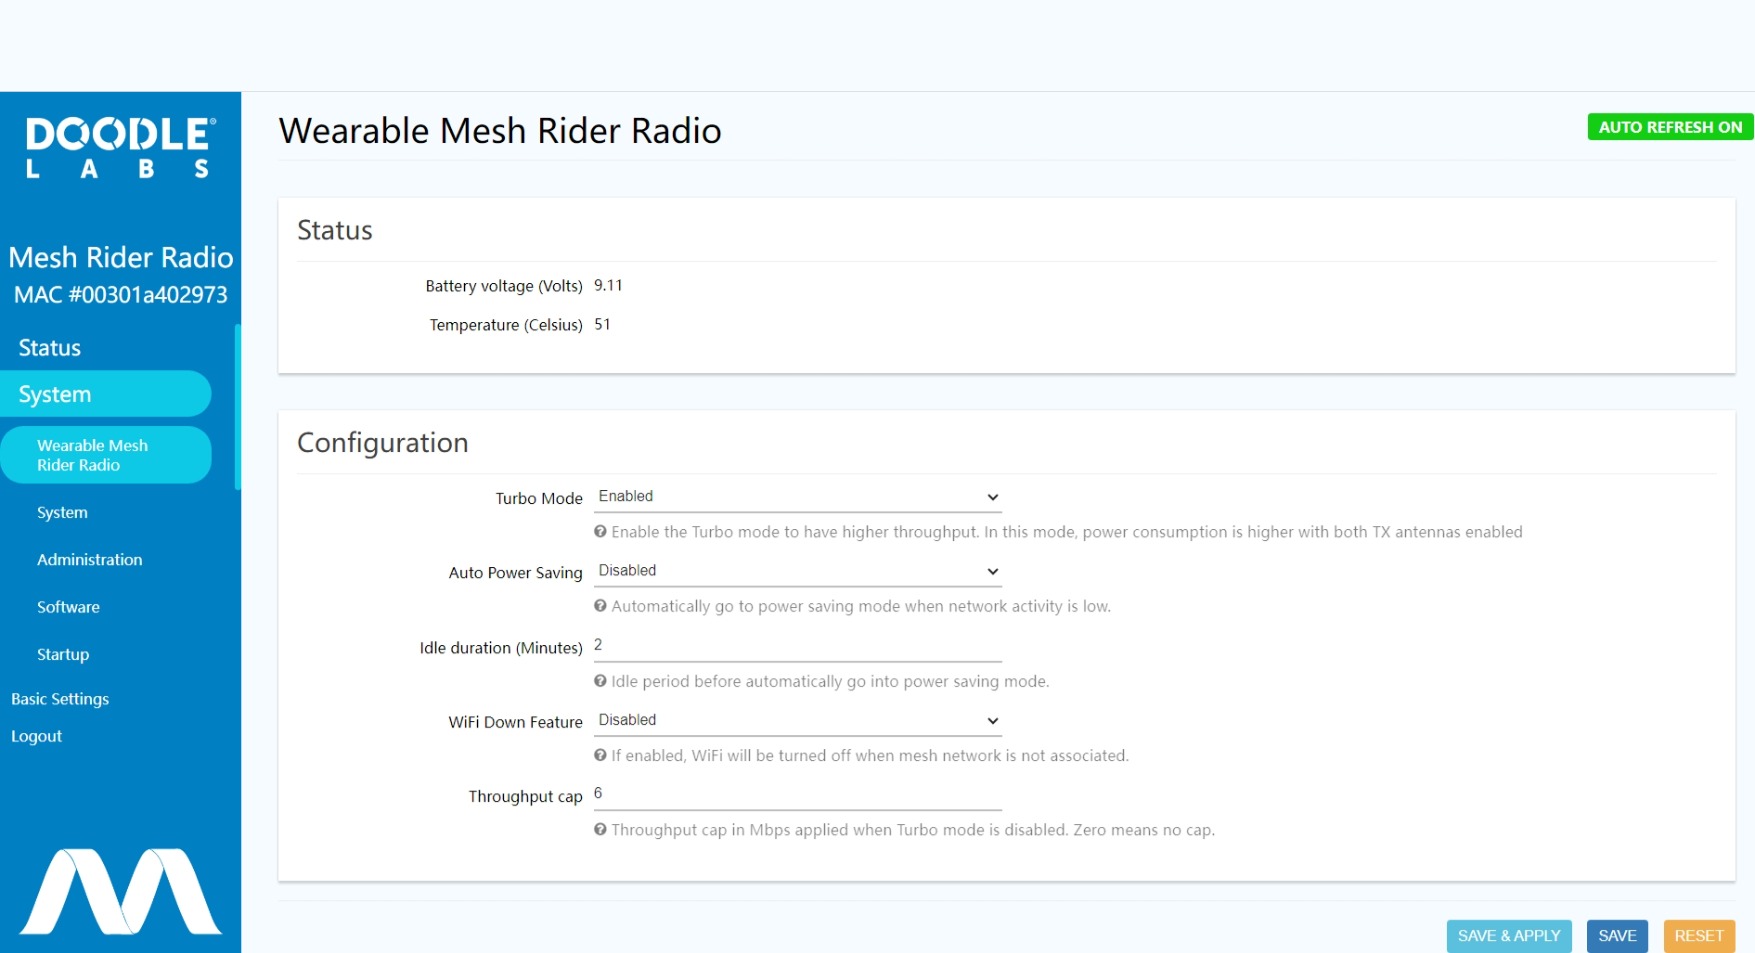
Fig. 3 Wearable Mesh Rider Radio Configuration
CLI
You can SSH into the radio to get to it's command prompt. The temperature and voltage can be accessed from the file /tmp/run/pancake.txt, which is in a json format.
root@smartradio:/tmp/run# cat pancake.txt
{ "Temperature": "33", "VIN VOLTAGE": "185" }
The voltage is a direct ADC reading, and the corrected value is found dividing the result by 20.2. In the example above, the battery voltage is 185/20.2 = 9.16 V. The temperature is in degrees celcius.
You can make Wearable-specific configuration changes using the wearable UCI file.
root@smartradio:/usr/lib/lua/luci# uci show wearable
wearable.main=wearable
wearable.main.gps_enable='1'
wearable.main.gps_antenna='1'
wearable.main.mesh_rider_antennas='1'
wearable.main.auto_temp_ctrl='1'
wearable.main.power_button='1'
wearable.main.auto_standby='0'
wearable.main.wakeup_duration='2'
wearable.main.sleep_duration='10'
wearable.main.wifi_down_enable='0'
wearable.main.turbo_mode='1'
wearable.main.throughput_cap='6'
Note that auto_temp_ctrl only enables the temperature sensor at this time. mesh_rider_antennas should not be modified.